

Monday, November 14, 2011

Sunday, November 13, 2011
Updates on projects
My '69 GP got a new kick panel (painted it black) and seatbelts (the retracting style) from the parts car, and those leaf catcher grilles that snap into the cowl next to the wipers. Replaced a low beam headlight and found that Wagner rules, Sylvania sucks. Also blew a rear wheel cylinder and had to replace that. A little maintainence goes a long way, the car is an absolute blast to drive when I can afford the $5/gal gas to feed a high compression 455. Second gear really plants your noggin on the headrest like a palm to the forehead.
My '72 GP keeps borrowing the '69's battery for fire-up attempts. I've removed the starter and checked it out, but I can't get the engine spinning fast enough to potentially fire. Looks like I'll have to swap starters and keep trying, luckily I have a pile of em. I installed a spare HEI distributor and plug wires, and set the timing. Trying to spend zero dollars on this, but I may need at least one new battery cable to make it happen. I did take the plugs out and squirted a mixture of solvent and oil into the cylinders. Left the plugs out and spun it for probably half a minute and it spins OK that way. From what I've seen so far, a novice was working under the hood around the time when this car got stashed, and theres a few things that indicate it must not have ran well if at all. But the plugs and oil look good and it spins freely. I just gotta keep trying, and I will as long as weather permits.
At work, I just spent a week on the '62 F-100 and am about to spend another. Blocking and filling and making it straight on the outside. Not much to look at, sorry. However I have assembled all the pics so far into one folder and looking at how much there is, I am considering forming a dedicated blog, just for that vehicle. If I do, I will link it here for sure. After this, that Bronco body is next.
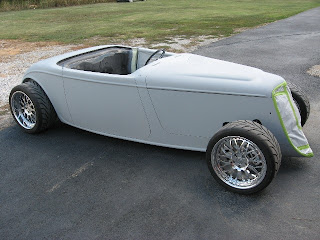
Aw, a post without a pic is like a bird with a broken wing. Heres a pic of the newest Factory Five '33 Hot Rod build (my friend does these, not me), this one has a hard roof. It just came off the trailer with all the goodie boxes:

My '72 GP keeps borrowing the '69's battery for fire-up attempts. I've removed the starter and checked it out, but I can't get the engine spinning fast enough to potentially fire. Looks like I'll have to swap starters and keep trying, luckily I have a pile of em. I installed a spare HEI distributor and plug wires, and set the timing. Trying to spend zero dollars on this, but I may need at least one new battery cable to make it happen. I did take the plugs out and squirted a mixture of solvent and oil into the cylinders. Left the plugs out and spun it for probably half a minute and it spins OK that way. From what I've seen so far, a novice was working under the hood around the time when this car got stashed, and theres a few things that indicate it must not have ran well if at all. But the plugs and oil look good and it spins freely. I just gotta keep trying, and I will as long as weather permits.
At work, I just spent a week on the '62 F-100 and am about to spend another. Blocking and filling and making it straight on the outside. Not much to look at, sorry. However I have assembled all the pics so far into one folder and looking at how much there is, I am considering forming a dedicated blog, just for that vehicle. If I do, I will link it here for sure. After this, that Bronco body is next.
Aw, a post without a pic is like a bird with a broken wing. Heres a pic of the newest Factory Five '33 Hot Rod build (my friend does these, not me), this one has a hard roof. It just came off the trailer with all the goodie boxes:

Wednesday, November 2, 2011
Bare Bronco on a stick!
This 1975 Ford Bronco was just sandblasted so now I have the task of cleaning and covering it all up, with black epoxy primer. It was a real pleasure to work on a rotisserie. Note the necessary bracing welded into the door openings. I have always done the underneath stuff on a creeper with a body dolly, and I'm sure this makes it easier for the sandblasting guy too. Having the ability to rotate the shell is a huge advantage when it comes to blowing out all the blasting media from various hidden cavities in the sheetmetal. They otherwise could never be upside down to dump the sand out. Or in this case, I believe walnut shell blasting media was used. Of course the adjustable position and better lighting for spraying inside wheelwells and other tight areas makes for much better coverage and corrosion protection. Before doing the body shell, I did all the bolt-on parts, too. Anyway, it was a pleasure, heres a peek!


Thursday, October 27, 2011
Beautiful '33 Hot Rod
This is a a Factory Five "'33 Hot Rod" that just left the shop. Its a kit car with a fiberglass body. EFI 351 dressed in Cobra 427 clothing, backed by a six speed. Silly fast. I did not work on this one, but ain't it a looker? Wow! Yes, the hood is not latched in one photo. The car is currently at the upholstery shop.




F-100 right door gap fix
As promised, a fancy metalwork post! Click pics to view larger.
Heres what the area in this post would look like on an unmodified 1962 F-100:

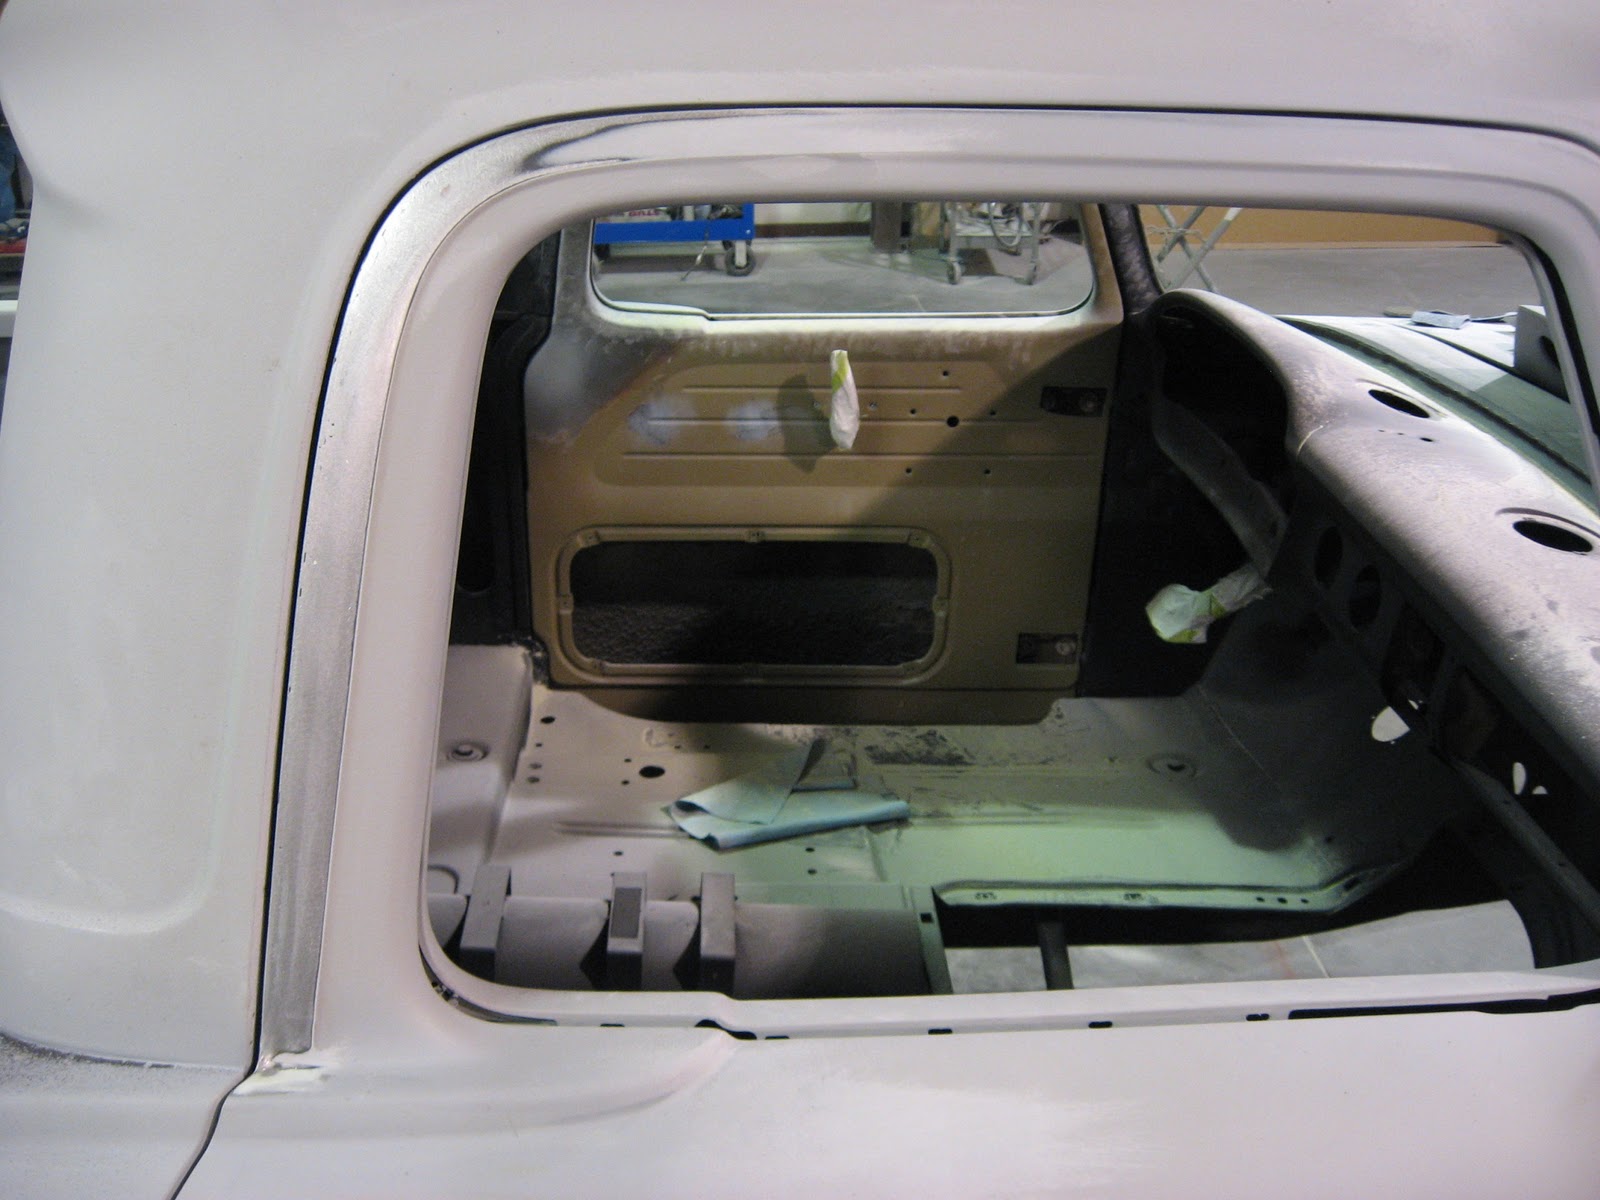
Our customer wants the panel gaps on this truck to appear to be laser-cut. On an old Ford pickup with shaved drip rails and rounded door corners, thats a tall order. When I recieved the body, heres what it looked like with the drip rail shaved and the top front corner of the door and door opening rounded:


 See how far the door sticks out past the roof? Thats the first thing I'll tackle here.
I made a patch to weld over the roof edge and make up the roof width. Before welding, I coated the backside of the patch and the roof edge with self etching primer to prevent rust between the two pieces.

Here it is tack welded to the roof:

After welding and grinding, you can still see the seam but there will be plenty of bodyfiller applied to the area and that seam will be buried.

Now I had a better top gap. But underneath what I just did had to be filled in with long skinny patches. Here are those, all welded up:
 Then theres the rounded front corner that still needed to be boxed in. Heres the fitted patch, and then again after welding then grinding:


Then I addressed the rounded corner of the door itself. More patching, these pics show what I did:


 OK so heres how the gap looks at this point:
 After some epoxy primer to cover all that bare metal:
 Now for the bondo and sanding:
 Then polyester primer:
 Looks nice, but not perfect. Still wide at the back. The hard part isn't so much the gap but having the panels sit flush across the face of the gap. So more blocking to fine tune that:


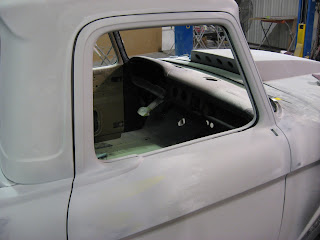 Heres the solution for that wide gap at the rear. Just some 1/8" steel rod that I will bend to fit and weld to the door edge, like I'm holding it in the pic.
 Here it is after welding. Uh-oh, look at how wide the gap still is in the middle.
 So I welded on another piece of the wire:
 OK, now theres enough there to grind out the shape I need. I welded both rods from both sides, so it took a lot of grinding with a 5" grinder and 36 grit discs. But I got what I wanted. Still needs that final skim coat of bondo, lol.
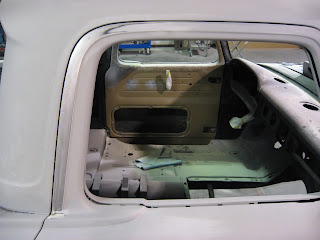 So its ALMOST finished! All this work was just to fix the window frame fit on one side of the truck! The other side was yet another adventure, just nowhere near as bad in this area. When you do a customized show vehicle, you take baby steps. There are lots more of those steps to show, in other areas of the truck. So stay tuned, more to come!
Heres what the area in this post would look like on an unmodified 1962 F-100:

Our customer wants the panel gaps on this truck to appear to be laser-cut. On an old Ford pickup with shaved drip rails and rounded door corners, thats a tall order. When I recieved the body, heres what it looked like with the drip rail shaved and the top front corner of the door and door opening rounded:


I made a patch to weld over the roof edge and make up the roof width. Before welding, I coated the backside of the patch and the roof edge with self etching primer to prevent rust between the two pieces.

Here it is tack welded to the roof:

After welding and grinding, you can still see the seam but there will be plenty of bodyfiller applied to the area and that seam will be buried.

Now I had a better top gap. But underneath what I just did had to be filled in with long skinny patches. Here are those, all welded up:


Then I addressed the rounded corner of the door itself. More patching, these pics show what I did:


Saturday, October 22, 2011
The parts car
OK now I own a Grand Three. Grand Prixs, that is!
Bought that 72 GP cheap and dragged it out of the ditch. I'll get it home this weekend and after that, I'll attempt to get it running. Then I will probably take out what I want and scrap the rest. As you can see, it was too close to a fire at some point, on the rearend. Notice the blistered paint and melted reflectors!
 Heres the gauge cluster. Cool, maybe I can use that. Mine has no gauges and I have added a tach where this clock is.

Bought that 72 GP cheap and dragged it out of the ditch. I'll get it home this weekend and after that, I'll attempt to get it running. Then I will probably take out what I want and scrap the rest. As you can see, it was too close to a fire at some point, on the rearend. Notice the blistered paint and melted reflectors!


Subscribe to:
Posts (Atom)